Roofing Installation Made Simple: How to Install a Roof Correctly
Roofing installation does not have to feel confusing or intimidating. Many homeowners want to understand how a roof is installed before starting a project or hiring help. Knowing the basics builds confidence and helps you avoid costly surprises.
This guide explains the roofing installation process in simple terms. We break down each phase, from preparation to final inspection. You will learn how to install a roof correctly, common mistakes to avoid, and practical roofing installation tips that support long-term durability.
What Roofing Installation Really Involves
Roofing installation is a system, not just shingles nailed in place. Each layer has a purpose. When installed correctly, those layers work together to protect your home from weather, moisture, and temperature changes.
A proper roofing installation includes:
- Structural inspection
- Surface preparation
- Protective layers
- Precise material placement
- Ventilation and drainage
Missing or rushing one step can shorten the life of the roof.
Preparation Comes First
Preparation is one of the most overlooked parts of the roofing installation process.
Inspect the Roof Deck
Before any materials are installed, the roof deck must be solid. Rotting wood, soft spots, or sagging sections need to be repaired. Installing over damaged decking leads to early failure.
This step is critical during residential roof replacement projects. You can learn more about this process on our Residential Roof Replacement service page.
Permits and Local Codes
Most cities, including Omaha, NE, require permits for roofing installation. Codes may regulate:
- Number of existing layers allowed
- Ice and water barrier placement
- Ventilation standards
Ignoring code requirements can cause issues with inspections or insurance claims.
Timing and Weather
Dry, moderate weather is ideal. Rain, snow, or extreme heat can create safety risks and affect material performance.
Roofing Materials Explained Simply
Understanding materials helps homeowners make informed decisions during roofing installation.
Asphalt Shingles
Asphalt shingles remain the most common option for residential homes. They balance cost, durability, and appearance. For more details, visit our Asphalt Shingle Roofing page.
Metal and Composite Options
Metal and composite roofing systems offer longer lifespans and strong resistance to severe weather. These options are covered on our Metal & Composite Roofing page.
Underlayment
Underlayment acts as a moisture barrier beneath the main roofing material. It adds protection if shingles are damaged by wind or hail.
Flashing
Flashing seals joints around chimneys, vents, skylights, and roof valleys. Poor flashing installation is one of the leading causes of leaks.
Roofing Installation Steps Explained
This section breaks down the core roofing installation steps in a clear, logical order.
Step 1. Remove Old Roofing When Needed
A full tear-off allows for inspection of the roof deck and ensures new materials attach properly. While some roofs allow an additional layer, tear-offs often provide better long-term results.
Step 2. Prepare the Surface
The roof deck must be clean and dry. Any damaged wood should be replaced. Proper surface condition supports a reliable roofing installation.
Step 3. Install Ice and Water Protection
Ice and water barriers are installed along eaves, valleys, and roof penetrations. This layer helps prevent leaks caused by ice dams and wind-driven rain.
Step 4. Lay Underlayment
Underlayment is rolled across the roof surface with overlapping seams. It adds an extra layer of protection beneath the shingles.
Step 5. Install Flashing
Flashing is placed around all roof penetrations and edges. Precision matters here because small gaps can lead to water intrusion.
Step 6. Install Roofing Materials
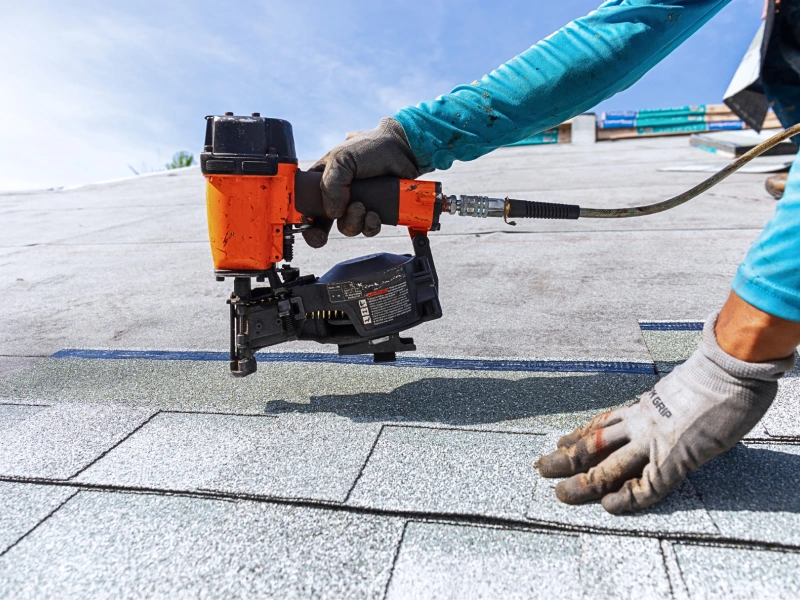
Shingles or panels are installed from the bottom up. Proper alignment and nail placement help the roof resist wind and weather.
Step 7. Finish the Ridge and Ventilation
Ridge caps protect the roof peak. Ventilation components help regulate temperature and moisture inside the attic.
Safety Considerations During Roofing Installation
Roofing installation involves working at heights. Safety should never be ignored.
Basic safety practices include:
- Secure ladders and fall protection
- Non-slip footwear
- Avoiding work during wet or windy conditions
- Controlled debris removal
If safety feels uncertain, it is wise to consider professional help.
Common Roofing Installation Mistakes
Understanding common mistakes helps homeowners avoid problems.
Incorrect Nail Placement
Improper nail depth or spacing reduces wind resistance.
Skipping Protective Layers
Underlayment and ice barriers are essential parts of the roofing installation process.
Poor Flashing Work
Even high-quality shingles cannot prevent leaks if flashing is installed incorrectly.
Ignoring Ventilation
Poor airflow leads to trapped heat and moisture, which shortens roof lifespan.
Practical Roofing Installation Tips
These roofing installation tips support durability and performance.
- Follow manufacturer guidelines
- Replace damaged decking immediately
- Keep gutters clear after installation
- Inspect the roof after severe weather
Proper gutter function also protects roofing systems. Learn more on our Gutter Installation & Replacement and Gutter Guards & Gutter Protection pages.
DIY vs Professional Roofing Installation
Some homeowners consider handling roofing installation themselves.
DIY May Be Suitable If:
- The roof is small and simple
- You have proper safety equipment
- Local regulations allow it
Professional Help Is Often Better When:
- The roof is steep or complex
- A full replacement is required
- Storm damage is involved
Storm-related projects often require insurance coordination. Visit our Storm Damage Roofing & Siding Repair page to learn more.
What to Expect During the Roofing Installation Process
Understanding what happens helps reduce stress.
- Material delivery before work begins
- Noise and vibration during installation
- Timeline based on roof size and weather
- Full cleanup after completion
Clear communication is a sign of a reliable roofing company.
How We Help With Roofing Installation in Omaha, NE
Roofing installation is a major investment, and trust matters. We are licensed, bonded, and insured, with 20 years of experience serving Omaha, NE, and surrounding areas. We focus on doing the job right, following a proven roofing installation process, and delivering dependable results. From residential roof replacement and roof repair services to siding, gutters, and commercial roofing services, we help protect homes and buildings with care and consistency. If you want reliable roofing installation you can count on, call Halo Roofing at (402) 599-3526. We’ve got you covered.